티스토리 뷰
반응형
@Configuration
@EnableWebSecurity
@RequiredArgsConstructor
public class WebSecurity extends WebSecurityConfigurerAdapter {
    private final UserService userService;
    private final BCryptPasswordEncoder bCryptPasswordEncoder;
    private final Environment env;

    @Override
    protected void configure(HttpSecurity http) throws Exception {
        http.csrf().disable();
//        http.authorizeRequests().antMatchers("/users/*").permitAll();
        http.authorizeRequests().antMatchers("/**") // 모든 URL 패턴 허용
                .hasIpAddress("127.0.0.1")
                .and()
                .addFilter(getAuthencationFilter()); // 해당 필터 통과한 데이터만 작업처리
        http.headers().frameOptions().disable();
    }
hasIpAddress() 안에 127.0.0.1 등 모두 해도 안됨
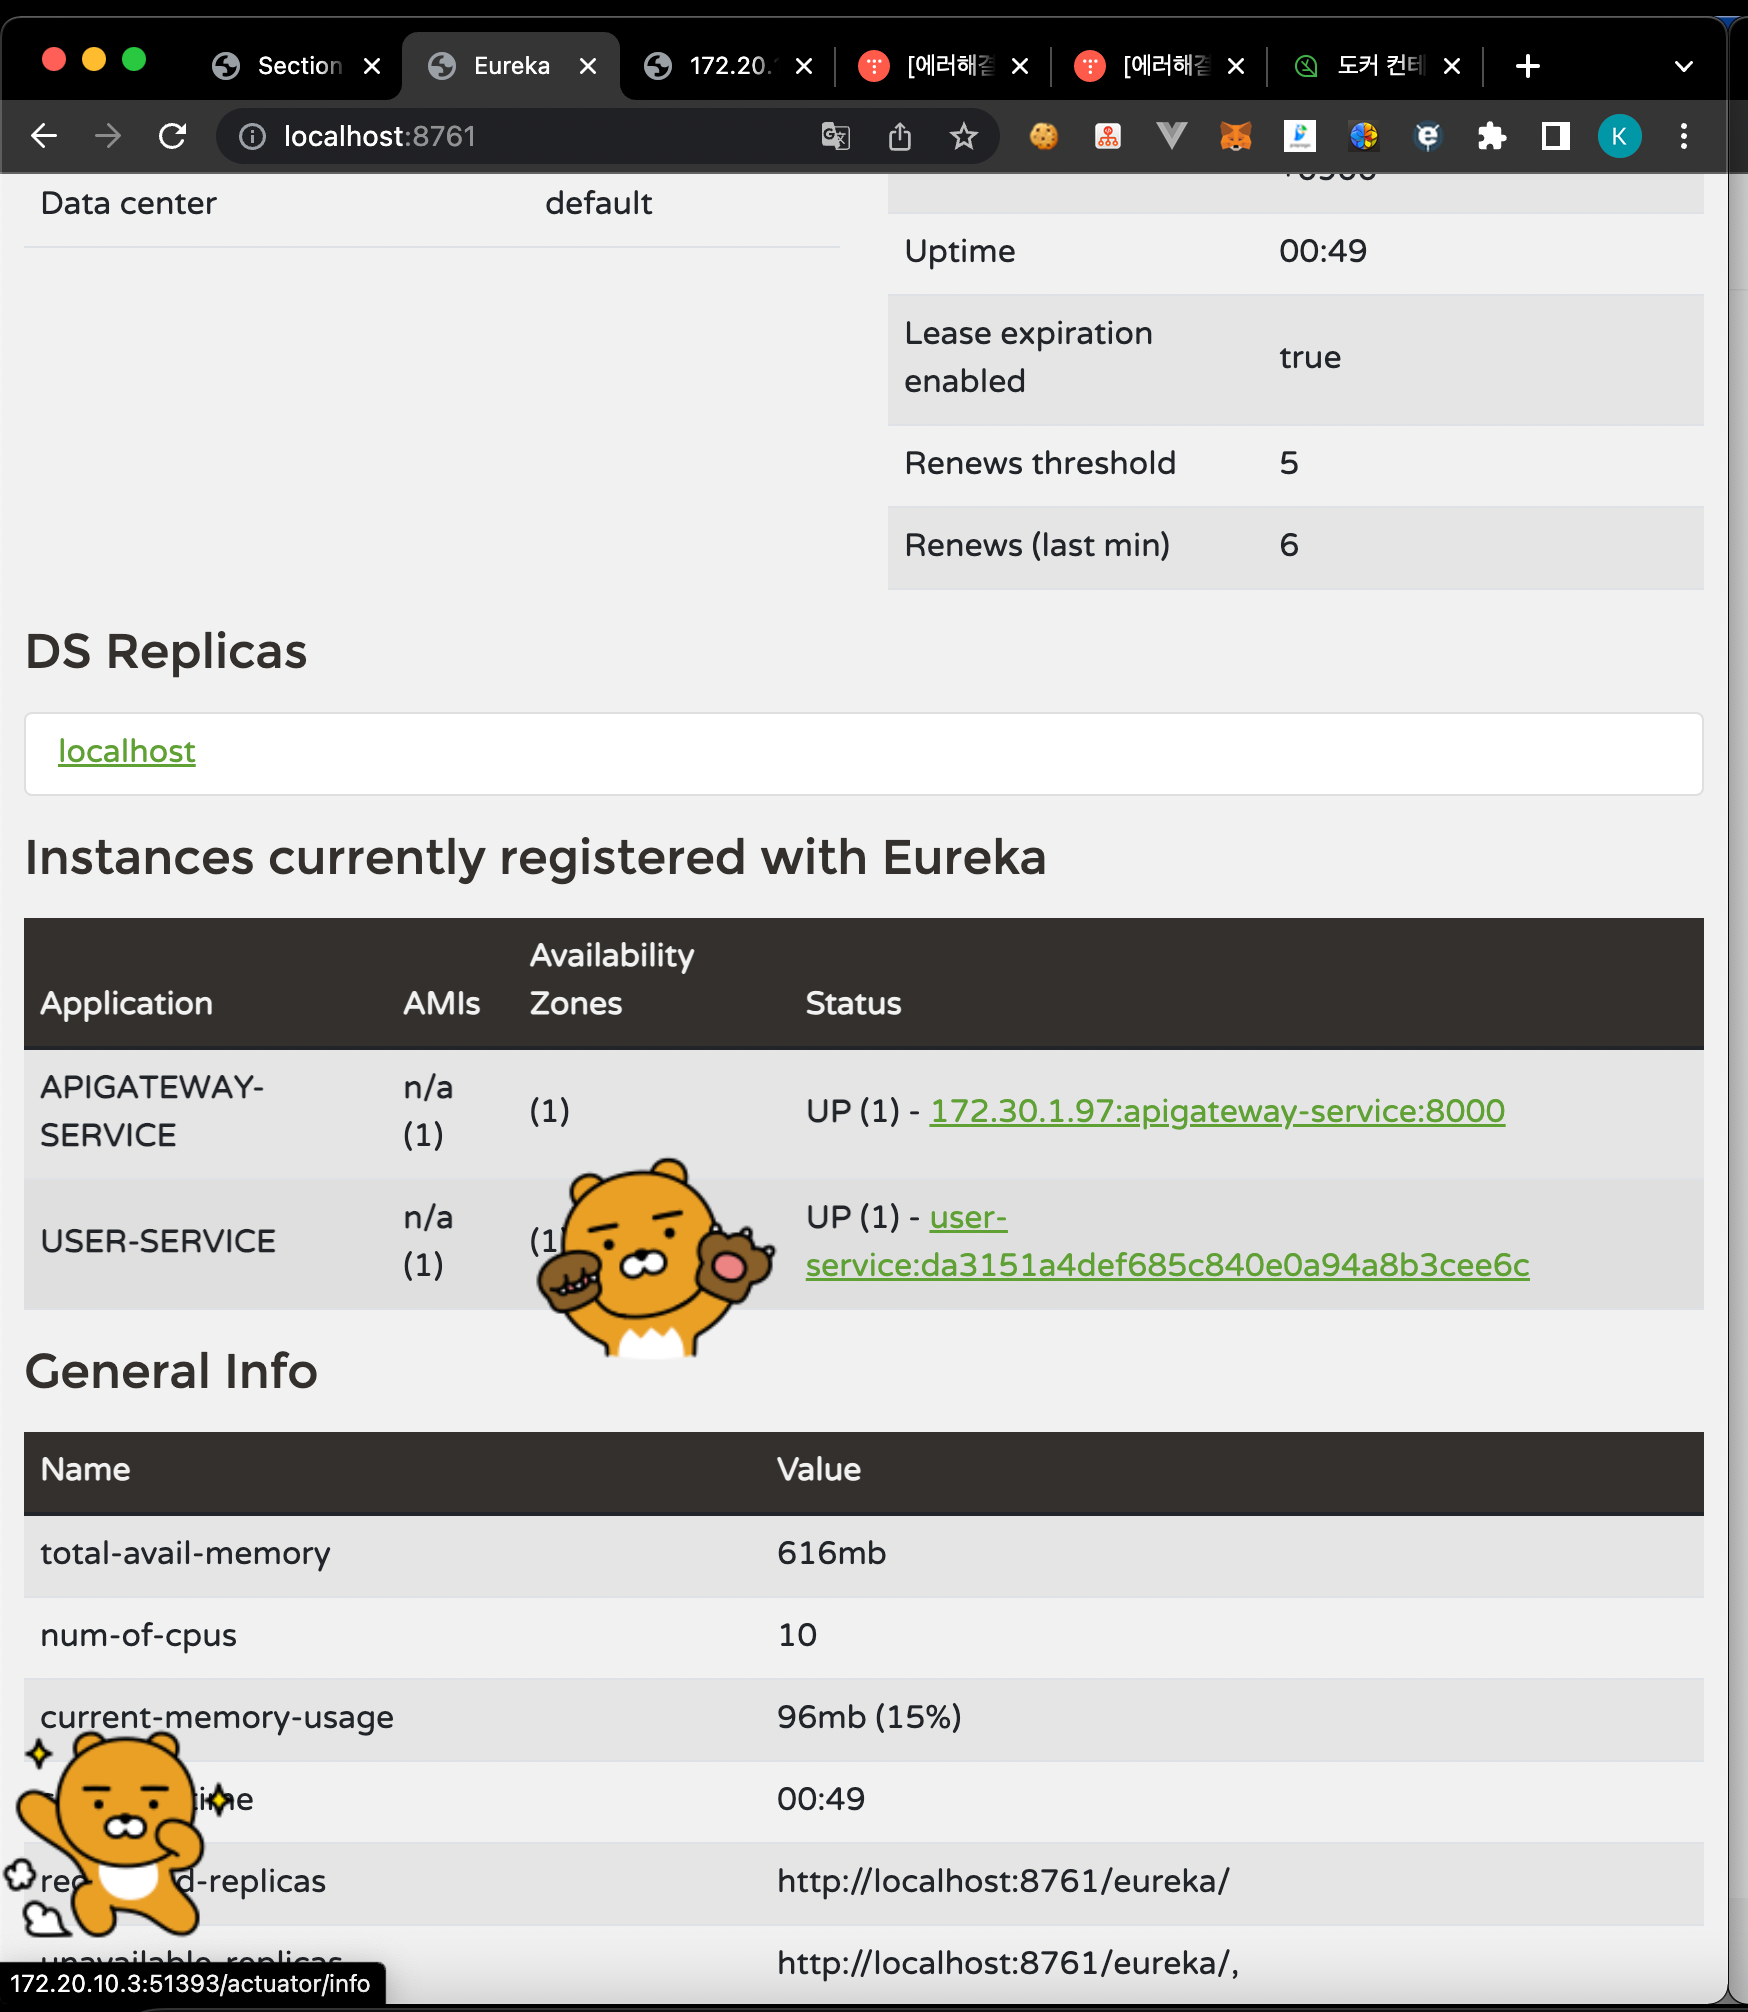
방법은 유레카 서버의 USER-SERVICE 주소 위 마우스 올려놓으면
브라우저 왼쪽 하단에 172.20.10.3.~~~ 어쩌구가 나옴
이때 IP확인 가능
필자의 경우 172.20.10.3 이였기에 입력함

적용 후
@Configuration
@EnableWebSecurity
@RequiredArgsConstructor
public class WebSecurity extends WebSecurityConfigurerAdapter {
    private final UserService userService;
    private final BCryptPasswordEncoder bCryptPasswordEncoder;
    private final Environment env;

    @Override
    protected void configure(HttpSecurity http) throws Exception {
        http.csrf().disable();
//        http.authorizeRequests().antMatchers("/users/*").permitAll();
        http.authorizeRequests().antMatchers("/**") // 모든 URL 패턴 허용
                .hasIpAddress("172.20.10.3")
                .and()
                .addFilter(getAuthencationFilter()); // 해당 필터 통과한 데이터만 작업처리
        http.headers().frameOptions().disable();
    }
그 후 POSTMAN 작동 시 성공

반응형
반응형
공지사항
최근에 올라온 글
최근에 달린 댓글
- Total
- Today
- Yesterday
링크
TAG
- 차이
- BeanFactory
- Vuex
- ApplicationContext
- install
- JPA
- Vue
- 최종연산
- nginx
- NPM
- Intellij
- 중간연산
- elasticsearch
- springboot
- lambda
- webpack
- java
- docker
- 람다
- 영속성 컨텍스트
- 자바8
- vscode
- mvn
- AnnotationConfigApplicationContext
- MAC
- map
- ngnix
- container
- 스트림
- stream
| 일 | 월 | 화 | 수 | 목 | 금 | 토 |
|---|---|---|---|---|---|---|
| 1 | 2 | 3 | 4 | 5 | 6 | 7 |
| 8 | 9 | 10 | 11 | 12 | 13 | 14 |
| 15 | 16 | 17 | 18 | 19 | 20 | 21 |
| 22 | 23 | 24 | 25 | 26 | 27 | 28 |
글 보관함
